

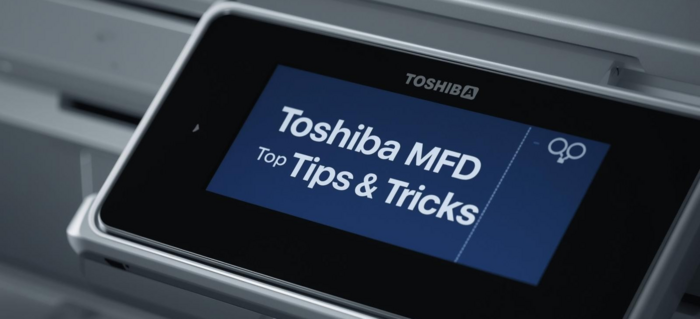
Toshiba Multifunction Device Tips & Tricks
Practical tips and guides to help you get the most from your Toshiba photocopiers and scanners.
These tips are designed to improve productivity, enhance security, reduce printing costs, and minimise device downtime.
Automate File Naming on Your Toshiba MFD
Stop manually renaming scanned documents—let your Toshiba MFD do it for you! Using the Template Feature, you can automatically name files based on pre-set rules, saving time and reducing errors.
Quick Steps to Set Up:
-
Scan Menu: Tap [Scan] on the MFD.
-
File Name Settings: Tap the [File Name] field (pencil/edit icon).
-
Template: Select [Template] (or T-shaped icon on some models).
-
Customise: Use variables like %Y (Year), %M (Month), %D (Day), %H (Hour), %m (Minutes), %USERNAME (Your login).
-
Example: %USERNAME_%Y%M%D_Invoice → JohnDoe_20240621_Invoice.pdf
-
-
Save & Scan: Press [OK], then scan—your files are automatically named!
Tip: Look for the edit or template icon next to the File Name field.
Boost Productivity: Scan Directly to Your Email
Save time and streamline your document workflows by scanning directly to your email from your Toshiba Multi-Function Device. No more waiting at the copier—get your digital files instantly!
How to Scan to Email in 5 Simple Steps:
-
Place Your Document
Load your document face-up in the Automatic Document Feeder (ADF) or face-down on the scanner glass. -
Tap the Scan Button
On the touchscreen, select Scan and choose Scan to Email. -
Enter Your Email Address
Tap To and select a saved address from the address book or type the email manually. -
Adjust Scan Settings (Optional)
Select color, resolution, or file format (PDF or JPEG) if needed. -
Start Scanning
Press Start. Your document will be sent directly to the specified email address.
Tip: If you scan to the same addresses frequently, save them in the address book for faster access next time.
Enable Mobile Printing & Scanning
With the Toshiba e-BRIDGE Print & Capture app, users can print and scan directly from their mobile devices. This feature supports flexible working and allows documents to be shared quickly without relying on a desktop computer. You could follow the below steps to set up mobile printing & scanning:
-
Download and Install the App
-
Download the free Toshiba e-BRIDGE Print & Capture app from the App Store (iOS) or Google Play (Android)
-
-
Connect to the Same Network
-
Ensure your smartphone or tablet is connected to the same Wi-Fi network as your Toshiba MFD
-
-
Add Your Toshiba MFD
-
Open the app > Tap the “+” or Add Device option > Select search, or manually enter the MFD’s IP address (available under Network on the device or from your IT administrator)
-
-
Print from Your Mobile Device
-
Tap Print > Select a document or photo
-
Choose your Toshiba MFD
-
Adjust print settings (copies, colour, etc.)
-
Tap Print
-
-
Scan to Mobile or Cloud
-
Tap Scan in the app
-
Place the document on the Toshiba MFD
-
Confirm your mobile device or cloud service as the destination
-
Press Start on the MFD and receive the scan on your phone or upload it directly to cloud storage such as Google Drive, OneDrive, or Dropbox
-
Improve Print Quality and Efficiency with Correct Paper Settings
Selecting the correct paper type on both the device and print driver ensures optimal print quality and performance. Matching paper settings helps reduce paper jams, improve image quality, and prevents unnecessary reprints.
How to Optimise Your Print Jobs with Proper Paper Settings:
-
Load the Correct Paper
Ensure your tray contains the paper type you’ll be printing on (e.g., plain, recycled, glossy, heavyweight). -
Select Paper Type on the MFD Panel
-
On your Toshiba MFD’s touch screen, tap [Paper] or [Paper Settings]
-
Choose the tray you’re using
-
Tap [Paper Type] and select the option that matches your loaded paper
-
-
Match Paper Type in Print Settings
-
From your computer, click Printer Properties or Printing Preferences in your print dialog
-
Under the Paper/Quality tab, select the same paper type you set on the MFD
-
-
Start Printing
Press [Start] on the device or Print from your computer. The MFD will now apply the optimal heat and speed settings for perfect prints.
-
Improve Security with User Authentication
Enabling user authentication on Toshiba MFDs helps prevent unauthorised access to device functions. PIN codes, usernames and passwords, or card authentication ensure only approved users can print, copy, or scan sensitive documents, while also providing accurate usage tracking. You can improve security by following the steps below:
- Access the Device Admin Menu
On the MFD control panel, press User Functions (often shown as a person icon or labelled on-screen).- Enter Administrator Mode
Tap Administrator and enter the admin password.
(If unavailable, check with your IT team or service provider.)
- Enter Administrator Mode
-
Open Authentication Settings
-
Navigate to User Management or Authentication Settings (menu names may vary by model).
-
-
Select an Authentication Method
-
Choose one of the following:
-
PIN code
-
Username and password
-
Card authentication (if supported)
-
-
-
Register or Import Users
-
Add authorised users manually or import them from a directory service such as Active Directory.
-
-
Save and Reboot
Save your settings and reboot the device if prompted to activate the configuration.
Maintain Clear Scans by Cleaning the Scanner Glass
Regular cleaning of the scanner glass helps prevent lines, shadows, and blurred scans.
Paying attention to both the main glass and the narrow feeder strip ensures consistently clear copies and scanned documents.
Cleaning Steps:
-
Turn off the device
For safety, always power down your MFD before cleaning. -
Open the scanner lid
Access the glass surface carefully. -
Use a soft, lint-free cloth
Lightly dampen it with water or a recommended screen-safe cleaner. Avoid harsh chemicals. -
Gently wipe the glass
Clean the entire surface, paying special attention to the narrow strip for auto-feed scans. -
Check for stubborn marks
If present, gently buff them out without scratching. -
Dry the glass
Use a second clean, dry cloth to remove any moisture. -
Close the lid and power on
Your MFD is now ready for consistently clear scans and copies.
-
Quickly Identify Issues with Error Codes
When your Toshiba MFD shows an error code, you can download the corresponding PDF from to view detailed explanations.
Knowing these codes helps you fix minor issues immediately and allows service teams to diagnose and resolve problems faster when professional support is needed. You can quicky identify and act on error codes using the steps below:
-
Spot the Error Code
When an issue occurs, the Toshiba MFD will display an error code on the control panel (e.g. CE40, C400). Make a note of the code shown. -
Access Error Information
On the home screen, tap the [HELP] or [i] (information) button. Depending on the model, this may be a physical button or an on-screen icon (gear or “?”). -
Review Error Details
Select Status or Error Information to view a brief description of the issue, such as paper jams or low consumables. -
Look Up the Solution
Use Toshiba’s online Error Code Reference Guide to search for the code and follow the recommended step-by-step resolution. -
Take Action
Follow the on-screen instructions for simple issues, or provide the error code and description to your IT support or Toshiba technician for faster assistance.
Save Time with One-Touch Scan Workflows
One-Touch Scan buttons allow users to scan documents with pre-set destinations and file formats. This simplifies document workflows, ensures consistency, and reduces errors when scanning to email, folders, or cloud storage.
How to Set Up Your One-Touch Scan
-
On your Toshiba MFD home screen, tap “Scan” or “Scan to File/Email.”
Visual cue: Look for the icon with a sheet of paper and an arrow. -
Choose your desired destination
-
Select E-mail, Shared Folder (SMB), or Cloud
-
Enter the recipient’s email or browse to your network folder
-
-
Select your ideal file format
-
Tap File Format
-
Choose from PDF, Searchable PDF, JPEG, or TIFF depending on your needs
-
-
Customize scan settings (optional)
-
Adjust colour mode, resolution, or duplex scanning as required
-
-
Tap “Add to Address Book” or “Save as Template”
-
Save these settings as a personalised One-Touch Scan button
-
Example: “Invoices to Finance”
-
-
Next time, simply press your One-Touch Scan button—Done!
Speed Up Printing with Network Optimisation
Configuring your Toshiba MFD to use TCP/IP Raw Port 9100 can improve print speed and reliability. This setting reduces network overhead and is particularly beneficial in busy office environments with high print volumes.
Step-by-Step: Set Your Toshiba MFD to Use TCP/IP (Raw Port 9100)
-
Admin Login
On the MFD control panel, tap Admin Login (you may need your admin PIN). -
Access Network Settings
Navigate to Admin Menu → Network → TCP/IP Settings. -
Enable Raw Port (9100)
Select Port Settings and ensure Raw Port (9100) is enabled.
▸ This protocol processes print jobs faster and with less overhead than LPR. -
Disable LPR if Not Used
If LPR is enabled but not in use, you can disable it to reduce network “chatter.” -
Save and Restart
Tap OK or Apply to save changes, then restart the device if prompted.
Track & Control Printing Costs with Usage Reports
Toshiba MFD usage reports allow businesses to monitor printing activity by user or department.
By reviewing counters and detailed job logs, organisations can clearly see where printing costs are generated and identify opportunities to reduce unnecessary usage, such as excessive colour printing.
How to Access and Use MFD Usage Reports:
-
Access the MFD’s Admin Panel
On your Toshiba MFD touchscreen, press the User Functions button, then select Admin (administrator login may be required). -
Open Usage Counter/Reports
Tap the Counter or Usage Report button. (Icon: usually depicted as a bar graph or chart) -
Select the Desired Report Type
Choose between By User, By Department, or Detailed Job Logs to see where most printing is happening. -
Export the Data
Press Export or Email Report to send the report to yourself or cost center managers in CSV or PDF format. -
Review & Act
Look for trends—such as heavy users or spikes in colour printing—and use this insight to adjust print policies or allocate costs accurately.
Unlock Productivity: Set Up Role-Based User Accounts on Your Toshiba MFD
You can make your Toshiba Multi-Function Device more secure and efficient by setting up user accounts with specific permissions. This way, each person only has access to the features they need, which keeps workflows smooth and organised.
How to Set Up Role-Based User Access
-
Access the MFD Admin Panel
On the touch panel, tap User Functions, select Administrator, and enter your admin password. -
Navigate to User Management
Go to User Management → User Registration to view existing accounts or add new users. -
Create or Edit a User
Tap Add User (or select an existing user to edit) and enter their details (name, department, login ID, etc.). -
Assign Role-Based Permissions
Under Role or Permission, choose a pre-set role like General User, Power User, or Admin, or custom permissions. You can limit access to features such as color printing, scanning, or certain job types. -
Personalise Settings
Configure frequently used functions for the user—like default scan destinations or print settings—for a customised experience every time they log in. -
Save & Test
Press Save, log out, and have the user log in to make sure everything works as expected.
Need further assistance?
If you require support or advice on your Toshiba photocopier or scanner, please contact our team and we will be happy to help.